How to Grow Mushrooms Indoors: Complete Guide to Cultivating Mushrooms at Home
If you’re a little mycology curious, you’ve come to the right place. I’m fascinated by mushrooms and, more specifically, by the mycorrhizal networks that exist below the surface, allowing trees to communicate and share resources. There’s tons of new research looking at fungi on this grand scale — and mushrooms are the “fruits” of these fungal networks — so on a smaller homesteading level, I was interested in understanding how to grow mushrooms indoors.
To get started growing mushrooms, you need to be aware of many variables. Whether you want to grow an edible species (like oyster or shiitake mushrooms) or a medicinal one (like cordyceps, turkey tail, or psilocybin) — you need to balance the essential elements: humidity, temperature, air exchange, and light. That, and a bit of TLC.
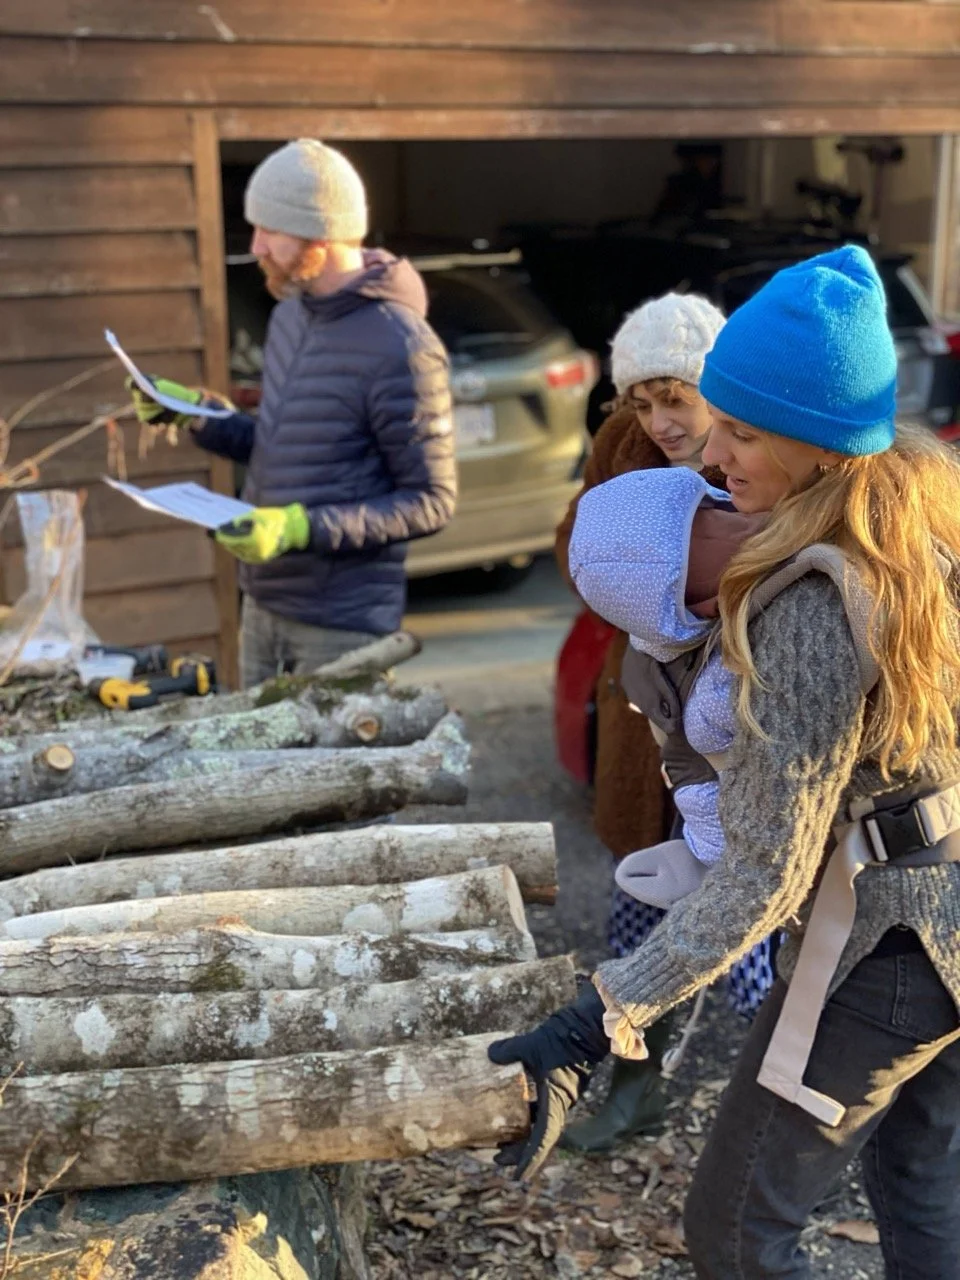
Our first experiment growing mushrooms outdoors kind of failed, probably for a bunch of reasons. We had some friends over to drill very specific holes in a bunch of logs and then hammered in inoculated plugs, and there’s a whole mythology here of soaking the logs in bathtubs and then dropping them to simulate the experience of limbs falling from trees, which apparently activates this fungus, but…for whatever reason we failed to grow any mushrooms on those logs.
So we decided to jump into an indoor grow, also with some failures along the way. Here’s our best assistance in managing inoculation, getting your moisture and water levels on point, harvesting, and everything in between.
Disclaimer: Many species of mushrooms look similar, and some are poisonous and potentially fatal for both pets and humans. When cultivating any species of mushroom, please do your own research, only purchase spores from reputable providers, and generally grow at your own risk! Growing magic mushrooms is illegal in many localities, including the USA. Psilocybin is listed as a Schedule 1 substance under the Controlled Substances Act, and any reference to magic mushrooms in this article is solely for informational purposes.
This post may contain an affiliate code or link that is no additional cost to you, and I may earn a small commission when a purchase is made.


First Things First: Mushroom Cultivation Basics
Before we get started, it's important to first decide what type of mushrooms you want to cultivate. Those growing Psilocybe cubensis (magic mushrooms) for research purposes would need to be aware of very different variables compared to those trying to grow Pleurotus ostreatus (Oyster mushrooms) for culinary purposes.
Growing Magic Mushrooms vs. Edible Mushrooms
The major difference between those hoping to grow a medicinal species versus an edible species lies in the choice of substrate. Magic mushrooms and portobello mushrooms are “dung-loving” species that grow on cow turds in nature, which is why the most common substrate of choice for these mushrooms is a mixture of coco coir, vermiculite, and gypsum (CVG) that basically mimics poop.
Obviously, magic mushrooms also have stricter legal requirements, because they have powerful psychoactive properties. While psilocybin is permitted for use in therapy in places like Colorado or Oregon, it is still federally illegal. It’s also important to note that psilocybin spores are legal in 47 states for purely research purposes.
On the flip side, those hoping to grow edible fungi such as oyster, shiitake, chestnut, and many other culinary all-stars have a lot more freedom in their research and can obviously enjoy the fruits of this fungus. In addition to simply studying the spores, mycologists can go a step further on legal varieties and start to spawn inoculation without potential legal woes.

Selecting the Right Species of Mushrooms
When deciding on the appropriate mushroom species for indoor cultivation, enthusiasts often turn to options like lion’s mane, shiitake, and oyster for their relative ease of growth and beneficial properties. Pleurotus, commonly known as the oyster mushroom, is highly regarded for its nutritional value and versatility as a vegetable in culinary applications. Shiitake mushrooms are not only a savory addition to meals but are also studied for their potential positive benefits on mental health. Grab you some spores at the links below (Use discount code “THUNDERBIRD” at North Spore for 10% off!):
Reishi - believed to boost immunity, reduce inflammation, and aid sleep.
Cordyceps - believed to have anti-fatigue, anti-aging and anti-cancer properties to improve energy, sex drive, and heart health.
Blue oyster mushrooms - highly flavorful (umami) and thought to boost immunity and lower cholesterol.
Pink oyster mushrooms - high in protein and fiber, a good meat substitute.
Black King oyster mushrooms - similar to the above, and a great source of vitamins and antioxidants
Shiitake mushrooms - delicious, low-calorie, lots of amino acids, and general nutritional value.
Lion’s mane mushrooms - mild shellfish flavor and consistency (a great substitute for crab or lobster), with adaptogenic (stress-reducing) medicinal benefits.
Morel mushrooms - coveted foraging mushrooms packed with vitamins, minerals, antioxidants, protein, and fiber.
How to Grow Mushrooms: Steps to Follow
With this basic information out of the way, let's dive in on how to grow mushrooms indoors. Below, we will cover all you need to know about growing mushrooms at home.
1. Get Your Materials
In any mushroom-oriented endeavor, it’s good to be prepared. This means gathering your materials beforehand. For a list of materials commonly used in mushroom cultivation, refer to the list below. Also, consider a wide variety of mushroom growing kits or all-in-one grow bags.
Use discount code “THUNDERBIRD” at North Spore for 10% off!
Materials You Need
Grow Tent, Grow Room, or even a reasonably clean closet (optional): Anywhere you can have some control over the environmental conditions. Helps if it’s also easily cleanable.
If you don’t have something that fits the bill, consider the BoomRoom II Automated Martha Tent Mushroom Growing Kit, an all-in-one indoor setup that can help automate your grow.
OR, All-in-One Fruiting Blocks: beginner-friendly, small-scale kits to start your growing game.
Automated Monotub for Growing Mushrooms: a beginner-friendly, self-contained chamber that gives you control of humidity, CO2, fresh air exchange, and spore filtration. Like a tiny BoomRoom.
Spore Syringe or Liquid Culture: Contains the spores to inoculate the grain or substrate and begin the growing process.
Sterile Grain Bag: the initial medium where spores spawn.
Manure Substrate or Hardwood Substrate: the nutrient-rich growing medium where the mushroom mycelium will grow and ultimately fruit.
Mason Jar or All-in-One Grow Bag: used to hold the substrate during colonization and ensure a sterile environment.
Pressure Cooker (Optional): To help eliminate contaminants, if your grain is not already sterilized.
70% Isopropyl alcohol, Isopropyl alcohol spray bottle, or similar disinfectant: Used to sterilize tools & surfaces to prevent contamination.
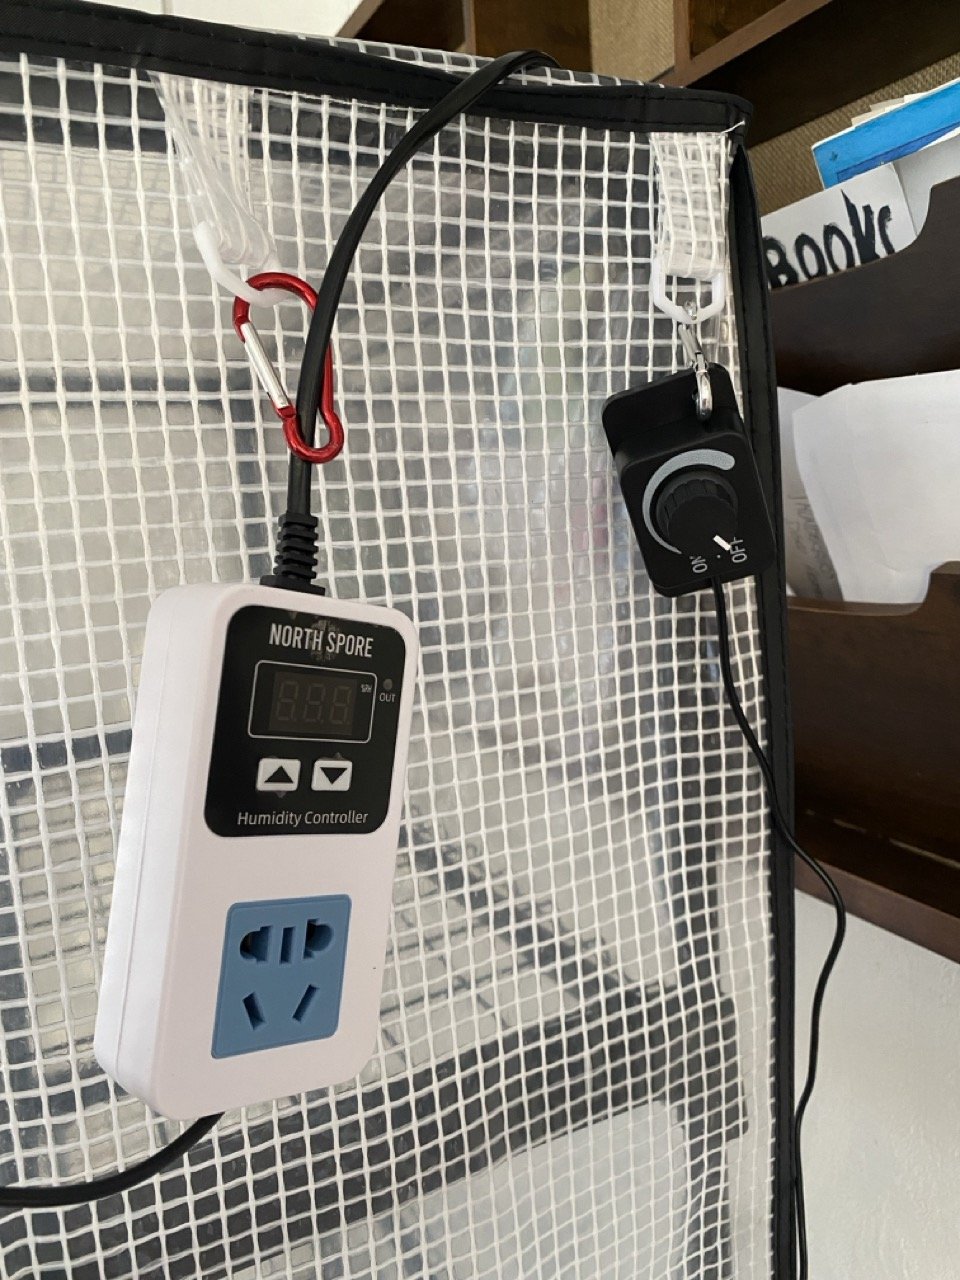
Temperature Gauge and/or Humidity Gauge: monitors the environment to ensure ideal growing conditions.
Humidifier: to provide optimal hydration for your indoor grow.
Lighting (indirect): eventually provides the light signals needed for mushrooms to fruit properly.
Scalpel or knife: Used to harvest the mushrooms carefully and cleanly.
Wet/dry vacuum: depending on your setup, you may need to suck up some excess water.


The BoomRoom II Automated Martha Tent Mushroom Growing Kit is an all-in-one indoor setup featuring a martha tent, humidifier, fresh air exchange fan, and humidity gauge, plus a nifty base that protects the floor.
2. Setting Up Your Indoor Growing Space
Once you have your materials ready, it's time to set up our indoor fungus garden!
To give yourself the best shot of a successful effort, you’ll want to start with a clean and sterile space.
You also need to be able to control temperature and relative humidity (RH) in this space to ensure that your substrate (like straw, compost, or CVG) is ready to shoot up some shrooms. I recommend getting a controlled monotub, grow tent, or “martha tent,” but it isn’t necessary. A shoebox-sized tub or lasagna tray in a closet can work just fine, with the right modifications.
Pay extra attention to lighting and ventilation, as they also play important roles in the health of new mushrooms. You don’t want direct sunlight, but some indirect ambient light is necessary.
Also, pay attention to safety measures (especially if you are putting extra heat in your tent) to avoid potential problems relating to contamination or fire hazards. Be smart and grow at your own risk.
Here’s a little more detail on the different aspects of setting up your indoor growing space.
Preparing a Clean and Sterile Environment
Having a clean and sterile environment is usually the first box to check off. Don’t skimp on this process. In addition to wiping down your grow tent or room from top to bottom, you should regularly disinfect all surfaces and tools with 70% isopropyl alcohol. I try to do a full clean every week or so. You want an environment where sterile substrates can promote healthy mycelium development without the extra noise of competing microorganisms.

70% Isopropyl Alcohol spray bottle is one of the only basic tools you need.
Setting Up Temperature and Humidity Measurements
Next, it's time to set your levels. Use gauges for both temperature and moisture levels. And, again, there are differences here based on the species or type of mushroom you’re trying to grow:
The optimal temperature range for magic mushrooms and some other medicinal species used to alleviate anxiety and mental health issues falls between 75°F and 81°F during incubation and about 68°F to 75°F for the fruiting phase.
The optimal temperature range for culinary mushrooms, on the other hand, can vary. Oyster mushrooms typically like it cooler (between 60-75°F) during fruiting, and common button mushrooms can even fruit as low as 55-65°F. It varies a lot between species, so make sure to do some research before getting started.
Monitoring these levels to ensure healthy growth from mycelium to mushroom is important.
Installing Proper Lighting and Ventilation
Light and ventilation are both important variables in ensuring the health of mushroom spawn and improving yields for a successful harvest. The idea here is to mimic the light situation that mushrooms experience in their natural habitat, which often lacks direct sunlight.
When paired with a ventilator or fresh-air exchange (FAE) fan, you will promote healthy airflow in your tent without risking the integrity of your substrate or introducing contaminants. A correctly-installed FAE helps control variables like RH and temperature, again, mimicking the damp coolness of the natural fungi habitat.
3. Selecting Your Substrate
We're getting close now! When it's time to add the grain to your growing medium or "substrate," and get one step closer to going from spore to shroom. Some mushrooms are "wood-loving," meaning they grow best in a mix of wood chips and sawdust (plus some nitrogen supplements) to mimic how they'd grow on a tree or log. Other mushrooms are "dung-loving," and prefer a blend of composted horse manure and coco coir, or the trifecta known as CVG (Coco coir, Vermiculite, and Gypsum).
Types of Mushroom Substrates
Here are some of the popular options:
Grain: Often millet, which provides an initial spawn medium for some species.
Sawdust: Ideal for fruiting shiitake and lion’s mane mushrooms.
Straw: Suitable for king oysters and white button mushrooms.
CVG: Ideal for fruiting magic mushrooms.
Coffee Grounds: Perfect for oyster mushrooms.
If you’re making your own substrate, consider pasteurizing it. This is different from sterilizing. Pasteurization leaves some of the bacteria and other microorganisms behind and is a crucial component for the expansion of mycelium. More info on pasteurizing here, and in a future blog post.
Mixing Nutrients to Enhance Mushroom Growth
You can also mix some nutrients into your substrate to enhance the growth of your shrooms. Most purchased substrates will already have nutrients mixed in, but if you’re DIYing it, here are some options to consider:
Soy Hulls: Great for boosting nitrogen levels.
Gypsum: Will improve moisture retention.
Wheat Bran: This can increase the carbohydrate content.
For best results, try mixing nutrient additives at a ratio of 10-20% of the weight of your substrate. Sterilize the mixture before inoculation to prevent contamination later.


4. Inoculating the Substrate With Spawn
Now is the time to finally inoculate your spawn — where the growth begins and the magic starts to happen. This process turns spores into spawn and eventually forms a more mature culture. Let me break down some of this terminology and the DIY process for inoculation.
Understanding Spores vs. Spawn: What's the Difference?
There are some common misconceptions between “spores” and “spawn” in the world of mycology. Spores are kinda like seeds in plants — they are the initial thing used for reproduction.
Spawn, on the other hand, refers to spores that have germinated into the fungal network. Spawn is like a seedling that has developed roots.
Getting a Successful Inoculation
Inoculating your substrate is a critical step in growing shrooms. Many species of mushrooms begin by inoculating a bag of grain, and then the substrate (wood-loving or dung-loving) is mixed together with this grain once this bag has fully spawned.
Start with a fresh cleanup to ensure your growing area is clean and sterile. Spray isopropyl alcohol on your surface, hands (or nitrile gloves), and on the grow bag itself.
Then, use a provided syringe to inject the spawn into your substrate (which is in your mason jar or grow bag). You’ll want to shake the syringe lightly to activate the spores, and make sure not to touch the needle tip directly (you can sterilize it further with a lighter if you wanna be safe).
Inject into the provided port on your grow bag, moving the syringe around slightly (without removing it fully from the port) to spread the goodness around. When you’re done, wipe the injection port one more time with an alcohol wipe.
Preventing Contamination During Inoculation
If I haven’t been clear enough, this injection must be performed under sterile conditions. To prevent contamination during inoculation, be a germ freak and make sure your grow area is always clean. This cannot be stressed enough, as contamination and mold can drastically alter your final products.
5. Managing the Incubation Process
After inoculation, we move into incubation, where the mycelial network (roots) grow and eventually give way to the actual mushrooms (fruit) we can harvest! Below, I’ll offer an overview of the process for creating a knockout incubation stage for all your mushrooms in order to get the highest yields possible.
Maintaining Optimal Conditions for Mycelium Development
The mycelium network’s development during this stage is crucial, as it will be what eventually helps develop the organism into the fruiting mushrooms. During this stage, pay extra attention to temperature and RH, making sure that they remain in the range of your selected species:
For magic mushrooms: 75°F to 80°F with an RH level right around 60-70%.
For culinary mushrooms: 60-75°F with an RH level between 70-75%.
Monitoring Growth and Identifying Healthy Mycelium
A good mycologist needs to be constantly observing. Know the difference between healthy mycelial growth (usually a vibrant white network of tiny roots) vs. a contaminated network (usually a drastic difference in texture and color — often green, black, or brown). As long as it remains white and vibrant, you should be solid.
About one to three weeks after inoculating, you’ll hopefully see white stuff clustered in a portion of your grow bag (probably along the bottom, or wherever you injected it). The next step is to break up and distribute this growth within the bag, so squeeze apart these chunks and spread the grain around. Then, leave it in the conditions above for another 2 to 4 weeks.
Troubleshooting Common Incubation Problems
If cultivators notice a lack of mycelial expansion or other problems with their indoor setups, you might need to look into the moisture levels and other potential problems related to nutrition. If it’s advanced in its contamination, you might need to start over.
Here are some common solutions to incubation problems:
Check Moisture Levels: Ensure the substrate has the appropriate moisture content for optimal mycelial growth. Make the appropriate adjustments.
Check Nutrient Composition: Examine the substrate for nutrient deficiencies and assess the composition of nutrients. If necessary think about adding suitable additives such as wheat bran or soy hulls as a supplement.
Maintain Cleanliness: To reduce the possibility of contamination during inoculation and incubation make sure that all tools and equipment are sterilized.
Control Temperature: To encourage good mycelial growth keep the incubation temperature at a healthy 75 - 80°F.
Keep an Eye on Airflow: Static air can encourage contamination, so make sure there is enough ventilation in the incubation environment.
Monitor Mycelium Growth Often: Check the jars frequently for indicators of contamination as opposed to healthy growth. This can help catch issues early.
Start Over: To prevent cross-contamination and guarantee successful growth, start over if contamination is severe and advanced.
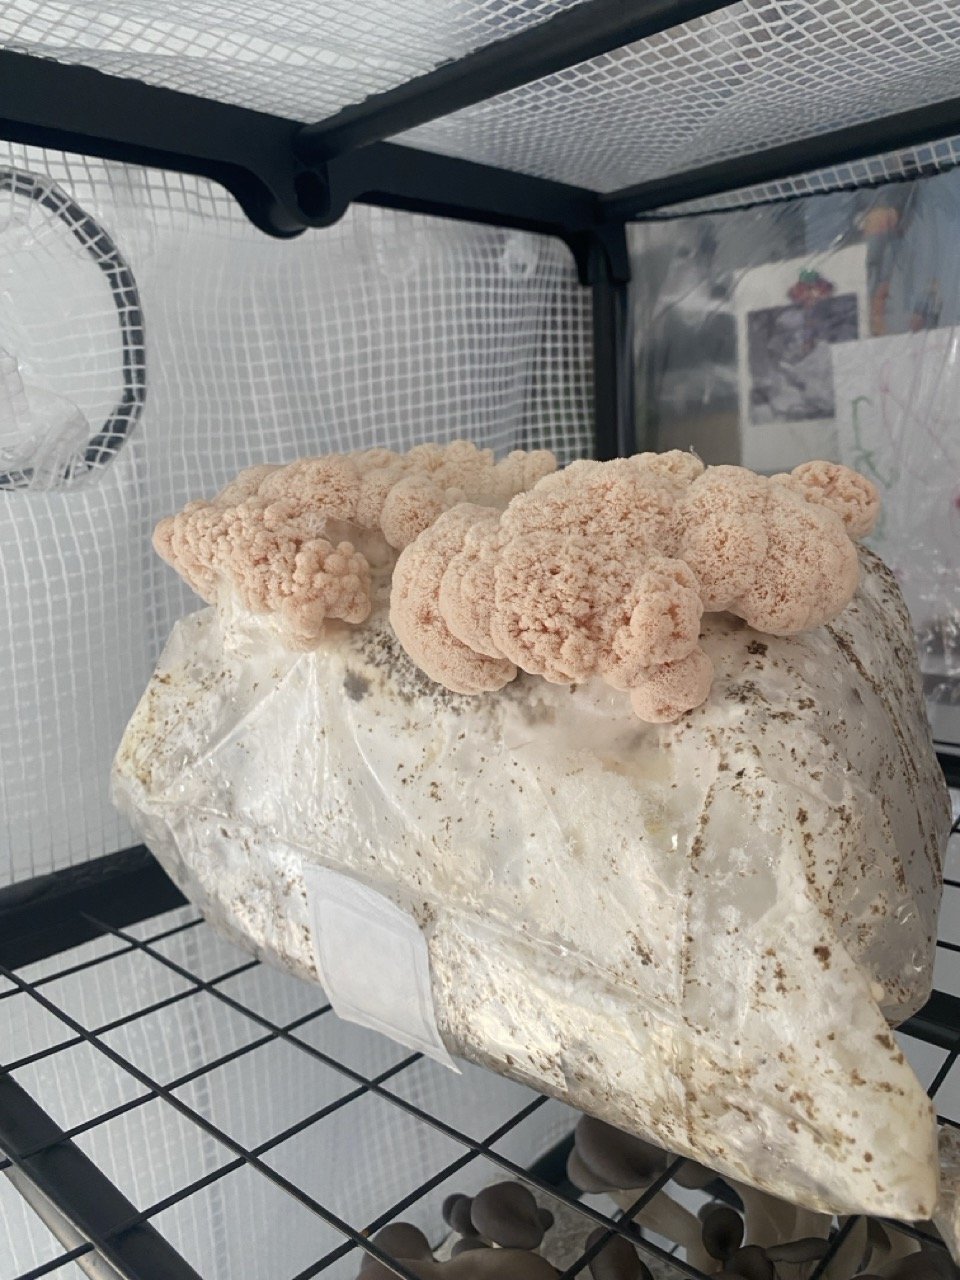
6. Harvesting Your Mushrooms
Now, for the part you have been waiting for: harvest time! Here’s what you need to know about the harvesting process for mushrooms.
Triggering the Fruiting Stage Successfully
Mycologists will need to replicate growth-promoting conditions for mushrooms to properly trigger the fruiting stage.
First, lower the temperature (usually by 10 to 15°F from the incubation levels) and introduce a light cycle — about 12 hours of light and 12 hours of darkness.
To encourage the development of fruiting bodies keep the RH high — between 85 and 95%. Be sure there is enough airflow in the fruiting chamber. You want to avoid CO2 buildup and promote the inflow of oxygen.
How to Know When Mushrooms Are Ready to Harvest
To maintain quality and prevent over-maturity it is essential to know when to harvest mushrooms. Harvesting is best done shortly before or right as the veil under the cap tears exposing the gills for most edible and medicinal mushrooms. This is an obvious indication of maturity: the mushroom is fully formed but not overripe.
For edible varieties like button or portobello mushrooms, it is best when the cap is still closed or just beginning to open. This is the optimal quality for consumption because the flavor and texture are at their peak and the texture is firm.
Techniques for Harvesting Without Damaging Future Yields
To guarantee future yields it's critical to harvest mushrooms without harming the underlying roots. Experts recommend carefully twisting and pulling the mushroom to remove it from its base. A clean knife or pair of scissors can also be used to trim the stem slightly above the substrate.
Then, verify that the substrate is clean and free of debris after harvesting by looking for contamination. After the substrate is clear, put it back in its growing environment to help ensure ongoing production (aka, multiple “flushes” of mushrooms)!
Storing and Preserving Your Harvested Mushrooms
Preserving the quality and potency of mushrooms after harvesting storage is important to retain shelf life. To maintain freshness, avoid moisture buildup and store fresh mushrooms in a cool dark place such as a paper bag or a refrigerator container with a loosely fitting lid.
Mushrooms can also be dried by air drying or using a food dehydrator for long-term storage. To prevent mold, make sure they are completely dry before storing. You can also place mushrooms on agar plates in a sterile environment to preserve them for further inoculation down the line.

Tips For Growing Mushrooms Successfully
Here’s a recap of tips to help you grow mushrooms successfully:
Maintain proper humidity levels at each stage
Only use sterile equipment and tools
Monitor temperature and moisture consistently
Ensure adequate airflow
Avoid overwatering the substrate
Inspect regularly for contamination
Frequently Asked Questions
Are Mushrooms Hard to Grow at Home?
If you have the know-how, quality spores, substrate, and a controlled indoor environment, growing mushrooms at home is pretty straightforward! If you are new, you can quickly catch up on how it works.
Can I Grow Mushrooms From Store-Bought Mushrooms?
Yes! You can use store-bought mushrooms to spawn mycelium on a substrate.
What is the Easiest Mushroom to Grow?
The easiest mushroom to grow is often recognized as the oyster mushroom due to its rapid growth potential, durability, and low substrate requirements.
What Conditions are Needed for a Mushroom to Grow?
Mushrooms thrive in moist environments — as long as they have enough humidity, the right temperature, minimal light, and a great substrate to support their growth.
What Triggers Mushroom Fruiting?
Mushroom fruiting is often triggered by environmental changes like a drop in temperature, an increase in RH, and a shift in light exposure, signaling to the mycelium that it is time for fruit.
What Speeds Up Mushroom Growth?
The right temperature and RH, proper air ventilation, and adequate substrate nutrition will help you speed up your mushroom growth.
How to Use Coffee Grounds to Grow Mushrooms?
Coffee grounds are an excellent substrate for growing mushrooms! Simply mix them with spawn, maintain proper moisture levels, and wait for your mushrooms to flourish.
Need Some Spores to Help You Grow Mushrooms?
After reading up on how to grow mushrooms, you might find yourself now inspired to try out growing on your own at home! If you need some great mushroom spores, you can buy mushroom spores at Fungushead or North Spore. They have a great variety of fungus friends to keep your mycology setup on point.
Remember that there are laws restricting the cultivation of many types of psilocybe cubensis (or magic mushrooms) and that these varieties are only sold to mycologists. Be sure to check your local laws before attempting to buy mushroom spores.